She had the two sleeves squished together on one aluminum needle, I’ll be transferring them to a #9 circ KP Harmony and jumping in!

And of course, it can't be that easy - in laying out the pieces on the floor, it seems the three body panels are three different sizes. :) The right front is two rows too short, and the back is four rows too long. Not to mention, the left armhole doesn't match up quite right with the back, even after shifting the back down four rows; that I'll just adjust that as I add the side panels to increase the width to fit my torso.
In the picture, you can see where the two top green grass rows don't match between the two front panels, and the front and back bottom grass rows don't match up either. I want to make all three body panels match up correctly before knitting the sleeves, collar, and side panels, so I'll be ready to seam together once the remaining knitting work is completed. I'll need to add in two background rows above the deer in the right front panel (leftmost in the pic), remove four rows in the background below the deer/grass bottom row in the back, and then may need to add in a couple of background rows above the deer and below the top grass, not sure yet - I have to count up the total body length first, to be sure. A good bit of blocking might do the trick there.
 I didn't want to unravel her knitting, but wanted to try to insert rows and remove rows as needed, without disturbing her original knitting too much, especially the intarsia. It may not be perfect, but it was knit by her! As I told my husband (who truly thinks I'm insane spending so much time and energy on futzing with the sweater), when she's no longer with us in this world, I'll have the sweater that she knit to put on and imagining her hugging me through it! Yes, this is more than worth it.
Back to the process. I knit a swatch, complete with 4 sts in reverse stockinette for the zipper band, and proceeded with yarny surgery.
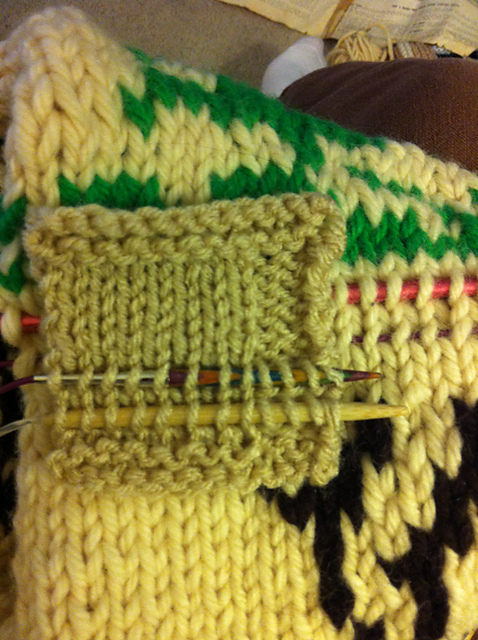
I've inserted needles above and below where I will cut. Carefully snipping the center stich and unraveling it, I had to adjust where the needles went into the stitches for the reverse stockinette. After separating the top and bottom halves, I added the new yarn to the bottom needle, knit two rows, and then lined everything up to begin kitchenering. Working the kitchener from right to left on the reverse stockinette was confusing, until I found a tutorial by Queen Kahuna that explained the "same off, opposite on" mantra. Knitty's Techniques with Teresa is helpful here, too. I just need to be careful where the purl is next to the knit stitch where the zipper band ends. I'm explaining this in detail for myself, as I've not done this before, and I want to keep things straight!
 Ok, enough practice, on to the beast itself! Crossing fingers and toes that I don't mess it up. :)


No comments:
Post a Comment